 The chances of finding a sixty or seventy-year-old car with perfect bodywork would range between impossible or unaffordable for the average restorer.
 There will always be bodywork to be done, meaning a lot of time and money spent fabricating, welding, dipping and sanding the shell before it can make its way to the paint booth.
One of the biggest challenges along the way is to repair and fill the possibly dozens of dents and dinks that the vehicle has suffered over the years it was on the road. The almost certainty of rust damage means that a lot of filling will be required in the final body repair stage.
From the car industry's dawn, lead was the body filler of choice- simply because there was no better alternative available.
 During the Fifties, fillers based on polyester came on the scene and replaced lead as the number filling solution in very little time.
 Understandable, as polyester fillers enjoy multiple advantages over the lead, it costs a lot less and is much easier to work with.
While the first plastic fillers on the market were resin-based partnered with talc (magnesium silicate). This combination would soon prove problematic due to its tendency to absorb excessive amounts of moisture.
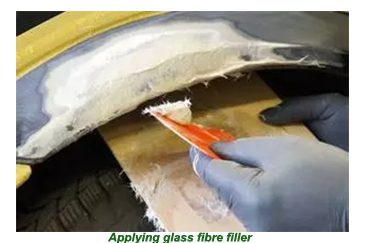
As time went by, manufacturers of plastic fillers replaced talc with a number of other ingredients such as marble spheres or fibreglass, considerably improving the status of polyester resins' ability as fillers.
In recent years lead as a filler has made something of a comeback with the discovery that this heavy metal, when combined with tin, made a reasonable alternative to polyester.
The recommended combination of lead and tin is a ratio of 60/40.
Working with a lead/tin alloy, known as "tinning", requires a little more effort than polyester as heated liquid flux must first be applied to the areas treated using steel wool.
![]()
After applying flux, the body must be wiped clean, ensuring that the surface is free of any remnants of residue.
For those who want a more comfortable life and are prepared to pay a little more to get it, many "off the shelf" products are available for tinning, flux mixed with granulated lead, available as a paste or a powder.
 Before taking any steps to fill in dents and damages to bodywork, the damaged areas must be closely scrutinised to ensure no traces of the original paint or primer remain.
Assuming that the body fillers being used for the job are epoxy resin-based, the two components that make it up, the resin and a hardener, must be combined according to a tried formula.
 The resin is the base material providing the 'bulk' of the filler, will remain in a 'putty-like state until it is mixed with a small amount of the hardening catalyst that will cause it to activate.
The two materials should be mixed vigorously for between five to ten minutes and then left to harden in a disposable container.
Once the material has hardened, it should be applied without too much time being wasted.
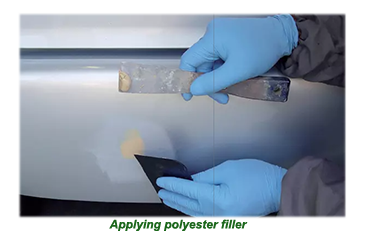
The best means available to apply filler is an elementary kit known as an "applicator".
The filler should be applied in liberal quantities across all areas where the metal has been exposed.
Where the dent is quite deep, a level of controlled force is permittable so that not even the most minute air pocket of air can remain.
When the dent is filled, a certain level of filler must be allowed to jut out enough to ensure it can be "sanded down" to meet the level of the bordering bodywork.
![]()
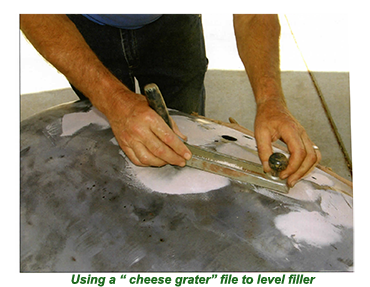
Once all that filler that has been applied is sufficiently rigid ( a process
The final sanding process can get underway when the filler has hardened ( a process that can take at least one hour ).
To get started on sanding areas that have been filled, it is recommended that 150 grit sandpaper be used.
 The best tool for this last and vital stage of final filling is rubber sanding block, which should be especially flexible for the best results as it will accurately and consistently follow the contours of the body panel.
 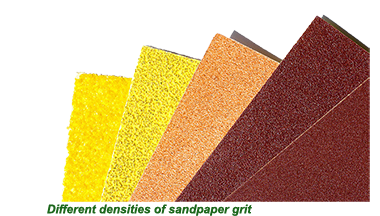 Once some progress is made, the sandpaper should be changed to 200 grit, and a gentler approach should be adopted to take the filler down to a level the panel that surrounds it.
 Once the sanding has been completed to the maximum level, the restorer should take a minute or two not only to admire their work but to thoroughly scan the paintwork for even the most minor of flaws.
If one or two raise their heads, all that is required is a dab of material known as spot putty, a super fine user-friendly material that will remove any remaining flaws in the bodywork.


pw3