Wheeling an almost completed classic car into the paint booth has to be one of the more fulfilling moments in any car restoration.
 By that time, countless hours of hard work and considerable financial and logistical resources have been invested in bringing the vehicle, which not so long was in a state of disrepair, into something remarkably close to being the finished article.
There remains a final and considerable challenge before the paint booth doors can finally swing open - adding the final touches before painting.
If the vehicle is being farmed out for respray, it is always possible to cut costs by doing most pre-paint preparation in-house.
All that will be required is a quiet and organised corner and a lot of elbow grease.
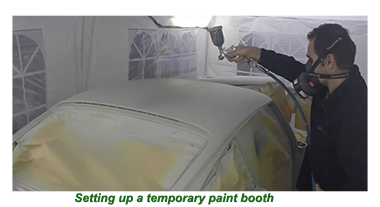
On the other hand, if the painting to be done is localised and lightweight, then a temporary booth can be set up, using nylon sheeting to separate it from the rest of the workshop.
 Spraying paint can be frenetic, making it be of prime importance to be organised and cool-headed.
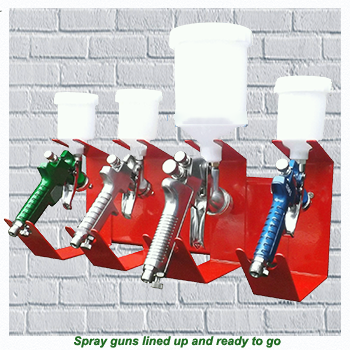
 The proper paint, the spray gun, a stirring stick, thinners and any other pieces of equipment that are vital to the operation must be in easy reach, with a minimum of clutter.
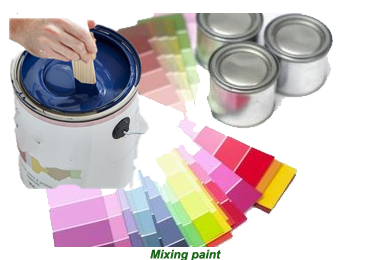
Restorers who prefer to mix their own paint need to strictly follow the proper steps; otherwise, the results might not be the way they hoped.
The stirring/measuring stick should be clean so that no foreign bodies can get mixed with the paint.
 The paint should be mixed using a back and forth scraping motion so that all of the pigment will be lifted from the bottom of the paint can.
It is also worth taking a look at the lid, and any paint remaining should be added.
With the paint stirred and ready for application, the restorer/painter should forestall their enthousiam for a few minutes so that they can be confident the colour mix they have come up with is precisely what they want.
![]()
Many experienced spray painters keep a few cardboard pieces around to make text cards to compare before deciding.
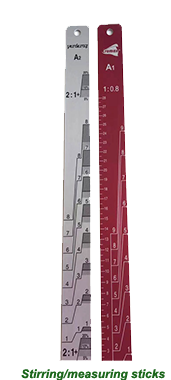
It is vital to understand the mixing ratio concept when mixing paint, which varies from product to product.
 Every paint can has a ratio number prominently printed on it , which will range from 1:1 or 2:1 or even 2:1:1, where there are three different mediums involved.
Whatever the specifics, the first number will refer to the paint, the second to the activator/hardener, and the third to the solvent.
 It is important to understand that activators can operate at different speeds depending on workshop conditions. Any knowledgeable paint supplier will be available to advise which category of hardener should be purchased if provided with all the relevant information.
Primers tend to be mixed at a 4 :1 ratio with up to 10% of thinners. Solid colours and lacquers will more likely be mixed at 2: 1 with a 10% thinner aspect.
 Solid colours and lacquer generally use a standard thinner, although temperature conditions should always be considered, and a faster or slower-acting solvent is ordered.
The most practical way to achieve a 1:1 mix ratio is to pour approximately half of the total amount into a calibrated paint beaker with parallel sides and insert the stirring stick.
The stick should then be raised so that its bottom tip is level with the top of the paint, which means that the tide mark will be at a height that equates to nearly double the ideal amount.
At that point, the second paint medium can be added with great care taken to ensure that the total paint level does not pass the tide mark.
Non-base and clear metallic paints should be mixed at the same ratio as solid paints but must be more thoroughly mixed to ensure an even finish.
![]()
The final stage in setting up the temporary spray booth is to set how and where paint will be applied to the panels.
If there are just a few panels, they can be sprayed on the bench as long as it has been well covered with nylon.
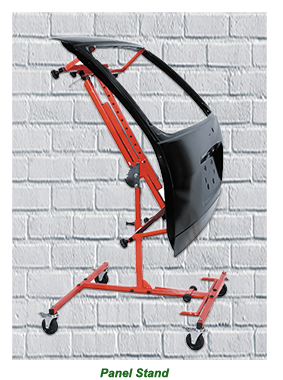
 Depending on the number of panels to be painted, it might be worthwhile to acquire a panel stand. These stands are simple, compact, and inexpensive. They come in sizes that can safely and securely hold any shape or size of car panel till the paint dries.
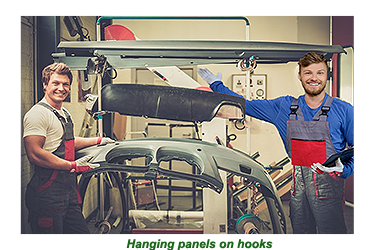
If a more significant number of panels need to be sprayed simultaneously, then investing in Skyhooks could be worth serious consideration.
With Skyhooks, the panels being painted are suspended in mid-air at a height that makes the spray process very straightforward.
Depending on the number of panels to be spray painted, customised frames can be put together fitted with aluminium Skyhooks on which the panels can be gingerly hung and left to dry.
 With everything in place, having a “wet run” is worth doing – especially if this will be the first time the restorer has handled a spray gun.
Before going “live,” any number of dry runs should be taken till the beginner painter gets a good feel for spray gun, getting used to handling in a way that mimics a real spray.
 Once a confident stance has been adopted, then doing a few trial sprays can also be taken on to pick up on and curb some bad habits that will have a negative effect on the paint job.
At this point there should be no reason for doubt and indecision- so let the spray painting begin!


pw3